Path of Idle Best Team: Tested Comps & When to Swap
Compare three community-tested Path of Idle team comps, learn what each role solves, and use clear swap rules when resistance, Fatigue, or survival stops a run.
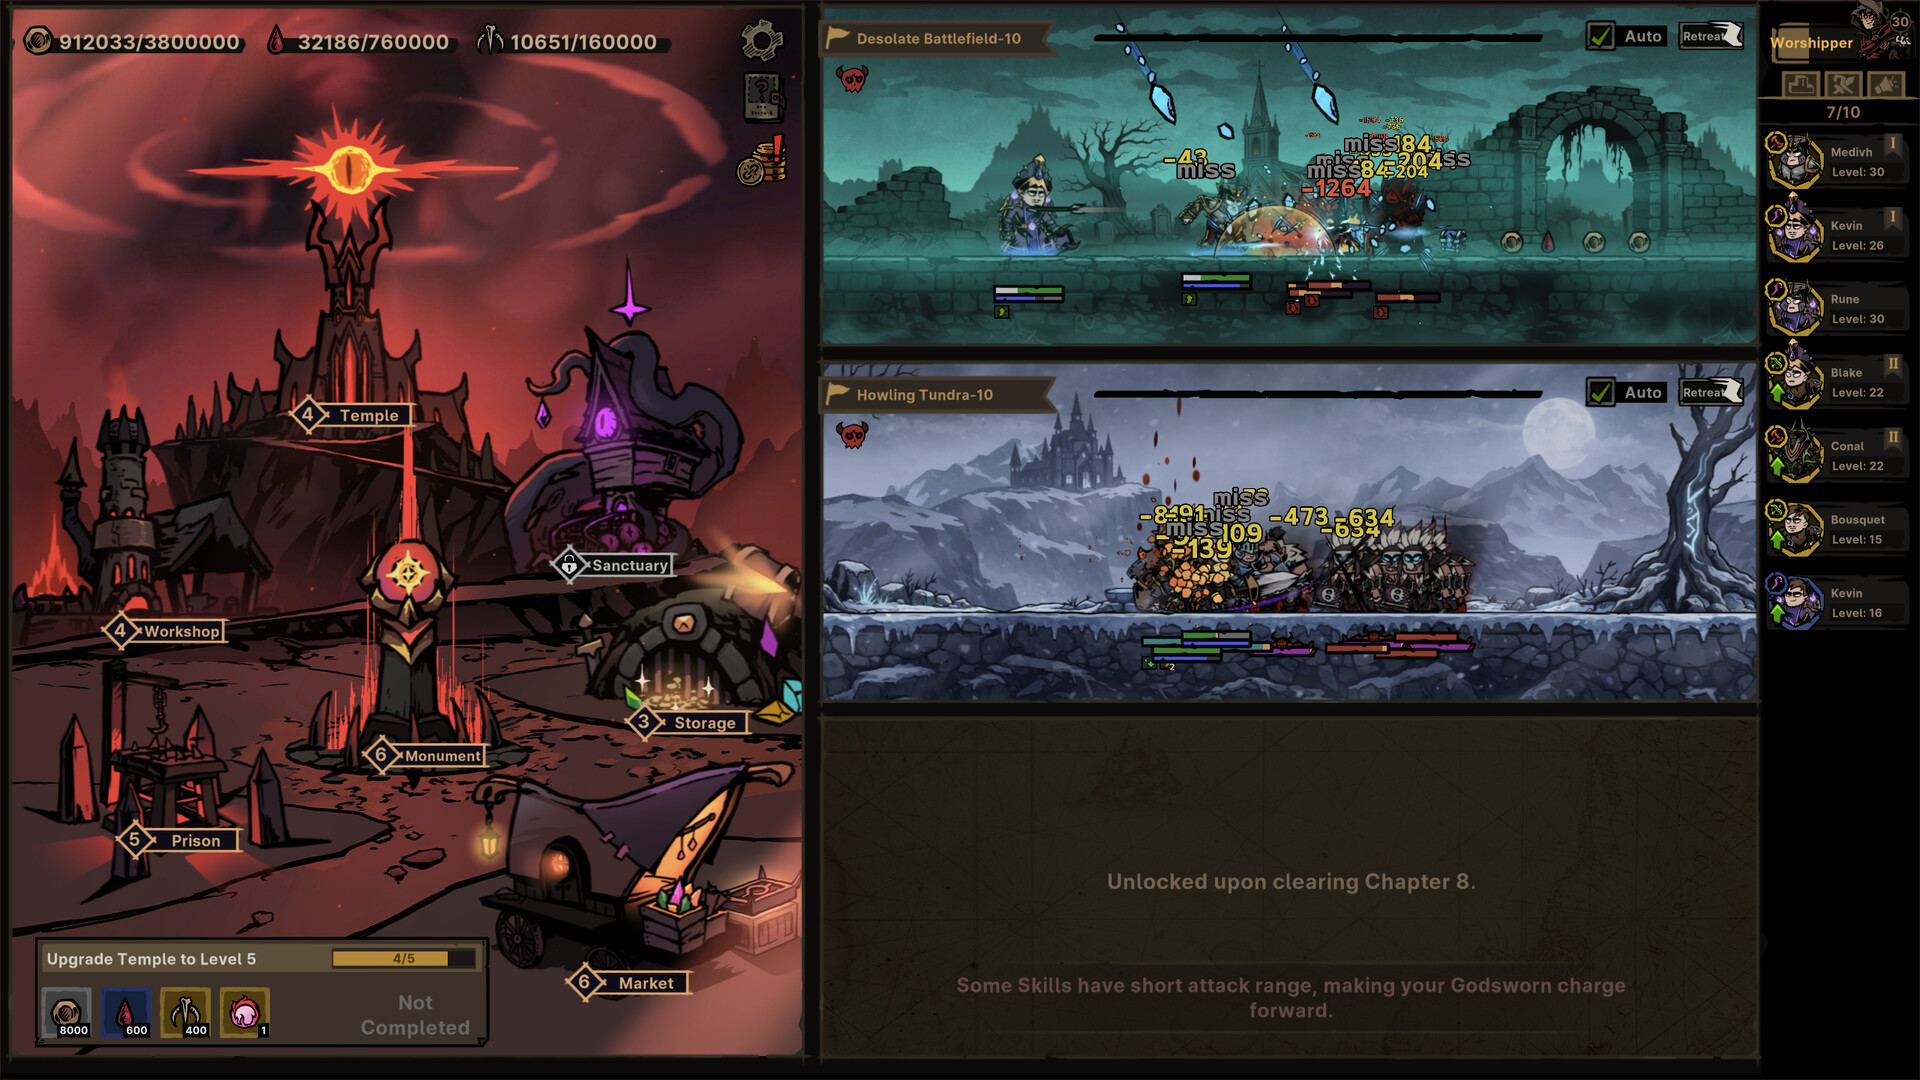
Use the two-line combat view to judge role coverage and identify which line fails first; it does not establish one permanent best team.
Credit: Official Path of Idle Steam store screenshot ↗
Version note: Interface context only; confirm current balance in Patch 1.0.9.
Quick Answer
- ✓A frequently reported general template is defensive Warrior + elemental Mage + Slime/Totem Priest; it is a starting test, not an official best team.
- ✓If a physical team stalls on resistant enemies, keep the frontline and build an elemental damage option.
- ✓Backliners moving into melee usually have a short-range basic skill or incompatible weapon selected.
Patch 1.0.10: Build Doom Teams for 3, 4, or 5 Slots
The official August 28 update changes the three Doom stages to allow 3, 4, and 5 Godsworn respectively. Godsworn who complete Doom no longer receive Fear and can participate in other battles. Doom stages 1 and 2 also apply special effects with random Godsworn attribute damage types. Do not copy one fixed Doom team across all three stages: check the current stage capacity and attribute condition, keep survival/support coverage, and change only the damage slot or package needed for that run.
Continue with: use the Doom build diagnosis
Source: Official version 1.0.10 notes ↗
Use This Page for Team Composition, Then Open the Build Center
This page answers which jobs a three-character line needs and when one role should be swapped. The Builds center handles narrower player problems: Warrior frontline or Doom failure, Lightning Mage against a physical wall, and Priest support instability. Keeping those tasks separate prevents this ranked page from competing with the broader Path of Idle Builds query while giving a stuck player a direct next step.
Continue with: browse the Path of Idle Builds centerdiagnose a boss wall
Best General-Progression Team to Build First
For a practical first target, build a defensive or Blood Boil Warrior in front, a Lightning Mage as the main elemental damage source, and an INT-focused Slime/Totem Priest for healing and buffs. Multiple full-release players reported variations of this trio clearing late chapters or stabilizing teams around Stele 14–20. The reason is role coverage rather than a magic class ranking: the Warrior buys time, the Mage solves clustered enemies and physical-resistance walls, and the Priest improves the whole line. Treat the exact sets as a target, not a requirement. Start with the closest in-game Recommended build, keep the same three jobs, and replace pieces as the correct sets appear.
Three Team Templates and When to Use Them
GENERAL PUSH — Blood Boil or defensive Warrior / Lightning Mage with optional Ice Barrier / Slime-Totem Priest. Use this when you need one dependable line for chapters and mixed enemy groups. PHYSICAL FARMING — Blood Boil Warrior / Pierce Hunter or Ballista Mercenary / Totem Priest. Use this while physical damage clears consistently; change the damage slot when Outlands resistance makes the line stall. ELEMENTAL PRESSURE — Divine Punishment Cleric or defensive support / Lightning or Fire Mage / Totem-Slime Priest. Use this when physical damage is being resisted or when a damage-heavy elemental line can survive without the Warrior. These are community-tested templates from the full-release week, not developer-issued rankings. Your recruit quality, set drops, Talents, and enemy resistances decide which version works.
Stuck at Stele 17–18: Diagnose the Constraint Before Copying a Team
A current 1.1.2-era Steam topic reports all three lines using the in-game Recommended builds, with Baptism and Golems raised as far as the account permits, yet progression still stopping around Stele 17–18. The thread had grown to 13 visible replies by September 25, confirming sustained demand, but it still does not establish one best composition, a required item, or a damage threshold. Treat the stage number as a diagnostic starting point: record which line fails, whether the first loss is survival or damage, and whether the same lineup behaves differently against another resistance profile. Change one role or equipment package at a time instead of rebuilding all three teams from an unverified comment.
Continue with: set up a controlled Training Grounds comparisonseparate damage, survival, and targeting failures
Source: Current Steam discussions list with the Stele 17–18 question ↗
Keep One Build Note for Every Godsworn
A current player request asks for an in-game note on each Godsworn so the intended item, skill, and build goal is not lost while managing several lines. That request proves a tracking problem, not that the game already has a note field. Until an official feature exists, keep one short external note per character: current role; target skill or Runeword; required weapon and damage family; the next item or affix to test; the set piece that must not be sold; and the stage or Training Grounds setup used for comparison. Update only the field that changed after each test. This turns a vague shopping list into a reversible plan and prevents an item for one unfinished build from being judged against another character's job.
Continue with: open the player-problem Build centerverify Runeword skills and sockets
Source: Current Steam discussion requesting per-Godsworn build notes ↗
Fix Backliners Running Into Melee
Position is not controlled only by the portrait order. Check the active zero-cost basic skill and its range. Full-release players found that a supposed backliner may run forward because a melee-range skill is selected or the equipped weapon does not support the intended ranged skill. Keep melee skills on the frontline; choose the ranged basic skill on the Mage, Priest, Cleric, Hunter, or Mercenary and equip its required weapon. Then replay the same fight and watch where the character stops. This is a faster diagnosis than replacing a good support because it appears to have broken positioning.
Source: Steam discussion: frontline and skill-range troubleshooting ↗
Swap Rules When the Team Hits a Wall
If the frontline dies first, keep the damage dealer and add defense, healing, shielding, summons, or a sturdier frontline. If the line survives but Fatigue rises while the boss remains healthy, preserve the support core and replace the damage slot or improve its focused stats. If a physical line suddenly collapses in Outlands, test an elemental Mage before rebuilding all three characters. If the backline dies while the tank is healthy, inspect skill range and weapon requirements. Change one slot at a time and retest the same stage for several attempts so random outcomes do not decide the conclusion.
Start With Roles, Not a Fixed Tier List
Path of Idle is being patched rapidly, so a fixed ‘best team’ copied from the demo can age badly. The official Steam page confirms six unique classes with separate skill systems. Earlier demo material prominently showed Warrior, Hunter/Archer, and Mage, while full-release notes also mention Priest and Cleric skills. Build around jobs: one durable front line, one source of reliable damage, and utility such as healing, shields, summons, or control. Judge the team by whether it survives and clears consistently, not by one character’s score.
How to Evaluate a New Godsworn
Use the Prison to compare recruits. First check class and skill requirements, then base attributes and quality, and finally whether the recruit fills a missing role. A high-quality duplicate can still be less useful than a support that makes the whole line stable. Test changes on the same stage so gear, enemy faction, and difficulty stay constant. Keep the version number in mind: balance changes can alter a skill without changing the broad role it fills.
Printable progression & build planner
Stop guessing at the next wall.
Plan the run, protect the loot, and test one useful change at a time with 12 tactical sheets built for real progression decisions.
- ✓ Two-line team and three role planners
- ✓ Equipment, town, automation, and boss worksheets
- ✓ Major verified-patch updates while actively maintained
English PDF · One-time purchase · No subscription · Unofficial community companion
Build Each Combat Line for Consistency
The game’s journey and exploration systems eventually ask you to spread Godsworn across multiple lines. Avoid concentrating every upgraded item on one group if that leaves resource exploration stalled. Give each active line enough survival to keep fighting, then place your best damage setup on the line pushing the next unlock. Summons can add bodies to a fight, but confirm the current in-game tooltip before investing because skill behavior has changed during the launch patches.
Reset Talents After Relevant Updates
Official version 1.0.5 changed Blessing to grant one Talent Point every five levels, up to six, with no random rolls. The developer explicitly told players to reset Talents after updating so the new Blessing points apply. Version 1.0.7 also fixed talent slots updating when Inspire changes. If a build looks weaker or has missing slots after a patch, verify the patch notes and refresh the affected setup before replacing the character.
A Repeatable Team Test
After Chapter 8, the official Training Grounds lets you hold Dummy Level and the number of targets constant from one test to the next. Use the same setting for both versions of a team, record whether each run succeeds, where the first Godsworn falls, and whether damage or survival changes. Swap only one recruit or one major equipment package, then repeat the same test. The update confirms selectable Dummy Level and one to six targets, but it does not publish dummy defenses, a best target count, rewards, or a universal DPS threshold. Repeat the comparison after a patch because a role may remain valuable even when an individual skill changes.
Continue with: review the Training Grounds evidence boundary
Source: Official version 1.1.1 Training Grounds announcement ↗
Endgame Sanctum Comp: Use Runs as Case Studies, Not a Tier List
A currently active Steam thread follows one player's Sanctum progress from Floor 334 to a linked Floor 4133 video, while other participants report substantially different lineups. That makes the thread useful evidence for a testing workflow, but not proof of one universal best comp or a required damage threshold. When you watch the run, compare the visible meters, stats, gear and first failure with your own installed build. Preserve the role that is working, change one recruit or equipment package, and replay the same floor range. The floor number demonstrates that player's result only; it does not guarantee the same result for another roster or patch.
One player's Floor 4133 Sanctum demonstration; use it to compare workflow and visible evidence, not as an official best-team ranking.
Credit: tromperie on YouTube ↗
Version note: Current full-release community demonstration linked on September 5, 2026; not an official balance recommendation.
Continue with: check the current stages and progression routes
Resource Allocation Across Multiple Lines
As Journey and Exploration expand, a roster must do more than win one showcase battle. Keep the pushing line strong enough to reach the next meaningful unlock, but give gathering lines enough durability to work without constant intervention. Move a premium item only when the expected unlock is worth slowing another line. Before recruiting a duplicate damage dealer, ask whether a healer, shield, summon, or control option would stabilize two existing characters. This portfolio approach usually produces steadier account progress than stacking every upgrade on the character with the largest visible number.
Understand the Skill Slots Above Talents
A common launch-week question is why some slots above a character's Talents are empty. Community testing reports that these slots can hold skills granted by other sources, including a Runeword skill; they are not simply missing Talent nodes. Treat an empty slot as an unlock or build-source question, not proof that the recruit is broken. Before replacing a Godsworn, inspect equipped items, Runewords, Codex choices, Baptism results, Inspire Masteries, and Mutated Skills. Patch 1.0.8 also makes the Talent UI update in real time when Mutated Skills change, which makes it easier to confirm whether a source actually modified the build.
Continue with: Runewords, sockets, and granted skillsCrystallized Skull and Mutated Skills
Shape Skills With Preferred Skills and Baptism
Do not approach Baptism as a completely blind reroll. Version 1.0.3 made Preferred Skills apply to Baptism and allowed Talents to be locked or unlocked by clicking them. Version 1.0.4 extended Preferred Skills to Mutated Skills, and version 1.0.5 changed Crystallized Skull so it changes Mutated Skills. The practical order is: decide the role, mark the skills that support that role as preferred in the Codex, protect the Talents you cannot afford to lose, then evaluate the result against the same combat test. A high-quality result that breaks the character's job is not automatically an upgrade.
Continue with: full Baptism and Talent-lock checklist
Read Damage Statistics Without Overreacting
The mid-battle statistics screen includes damage information, but one damage total cannot describe a full team. A support may contribute through healing, shields, resistance reduction, control, summons, or keeping the main damage dealer alive. Compare the same encounter over several attempts and record total damage together with first death, clear time, and failure point. If a swap raises displayed damage but turns a stable clear into repeated deaths, the old team was functionally better. Patch notes have repeatedly corrected skill descriptions and shield counting, so use the installed version's tooltip and current results together.
Patch 1.0.8–1.0.9 Team-Building Changes
Version 1.0.8 added auto configuration inside combat and real-time Talent UI updates when Mutated Skills change. It also fixed Cloudpiercer causing Wild Frenzy to cost Health. Version 1.0.9 then added Preferred settings for Codex class Masteries used by Golems and Inspire. Re-test affected builds instead of assuming the class itself is weak, and do not confuse the new Mastery preference with Baptism Preferred Skills. Neither update published a universal class ranking.
Gear That Helps With Team Testing
A comfortable setup makes repeated team tests less tedious. A mouse with programmable side buttons can map to common inventory or skill actions. A monitor with good contrast helps distinguish rarity colors during fast equipment reviews. For long idle sessions, a cooling pad keeps laptop temperatures stable. These are general PC-gaming recommendations; none are required to play Path of Idle. If you purchase through the links, this guide may earn a small commission at no extra cost.
Continue with: gaming mice with side buttonslaptop cooling pads
Related Guides
Evidence Sources
- Official Steam store ↗
- Official update feed ↗
- Official version 1.1.1 Training Grounds update ↗
- SteamDB app history and platform metadata ↗
- Current Steam discussions: Stele 17–18 team-composition question ↗
- Current Steam discussion: request for per-Godsworn build notes ↗
- Steam discussion: beginner team and skill-slot questions ↗
- Steam community: 22-post team composition testing thread ↗
- Steam community: frontline positioning and skill-range diagnosis ↗
- Steam community: evolving endgame Sanctum team tests ↗
- YouTube: the thread author's Floor 4133 Sanctum run ↗
Revision note: checked against the sources above on 2026-09-25. Recheck in-game tooltips after every balance update.